通过hexo+github+trvis-ci搭建个人博客
AI-摘要
SiliconFlow GPT
AI初始化中...
介绍自己 🙈
生成本文简介 👋
推荐相关文章 📖
前往主页 🏠
前往爱发电购买
通过hexo+github+trvis-ci搭建个人博客
Alontries-ci已收费,且github.io在国内访问较慢,推荐使用 netlify 部署,支持github一键部署,且国内访问流畅
github
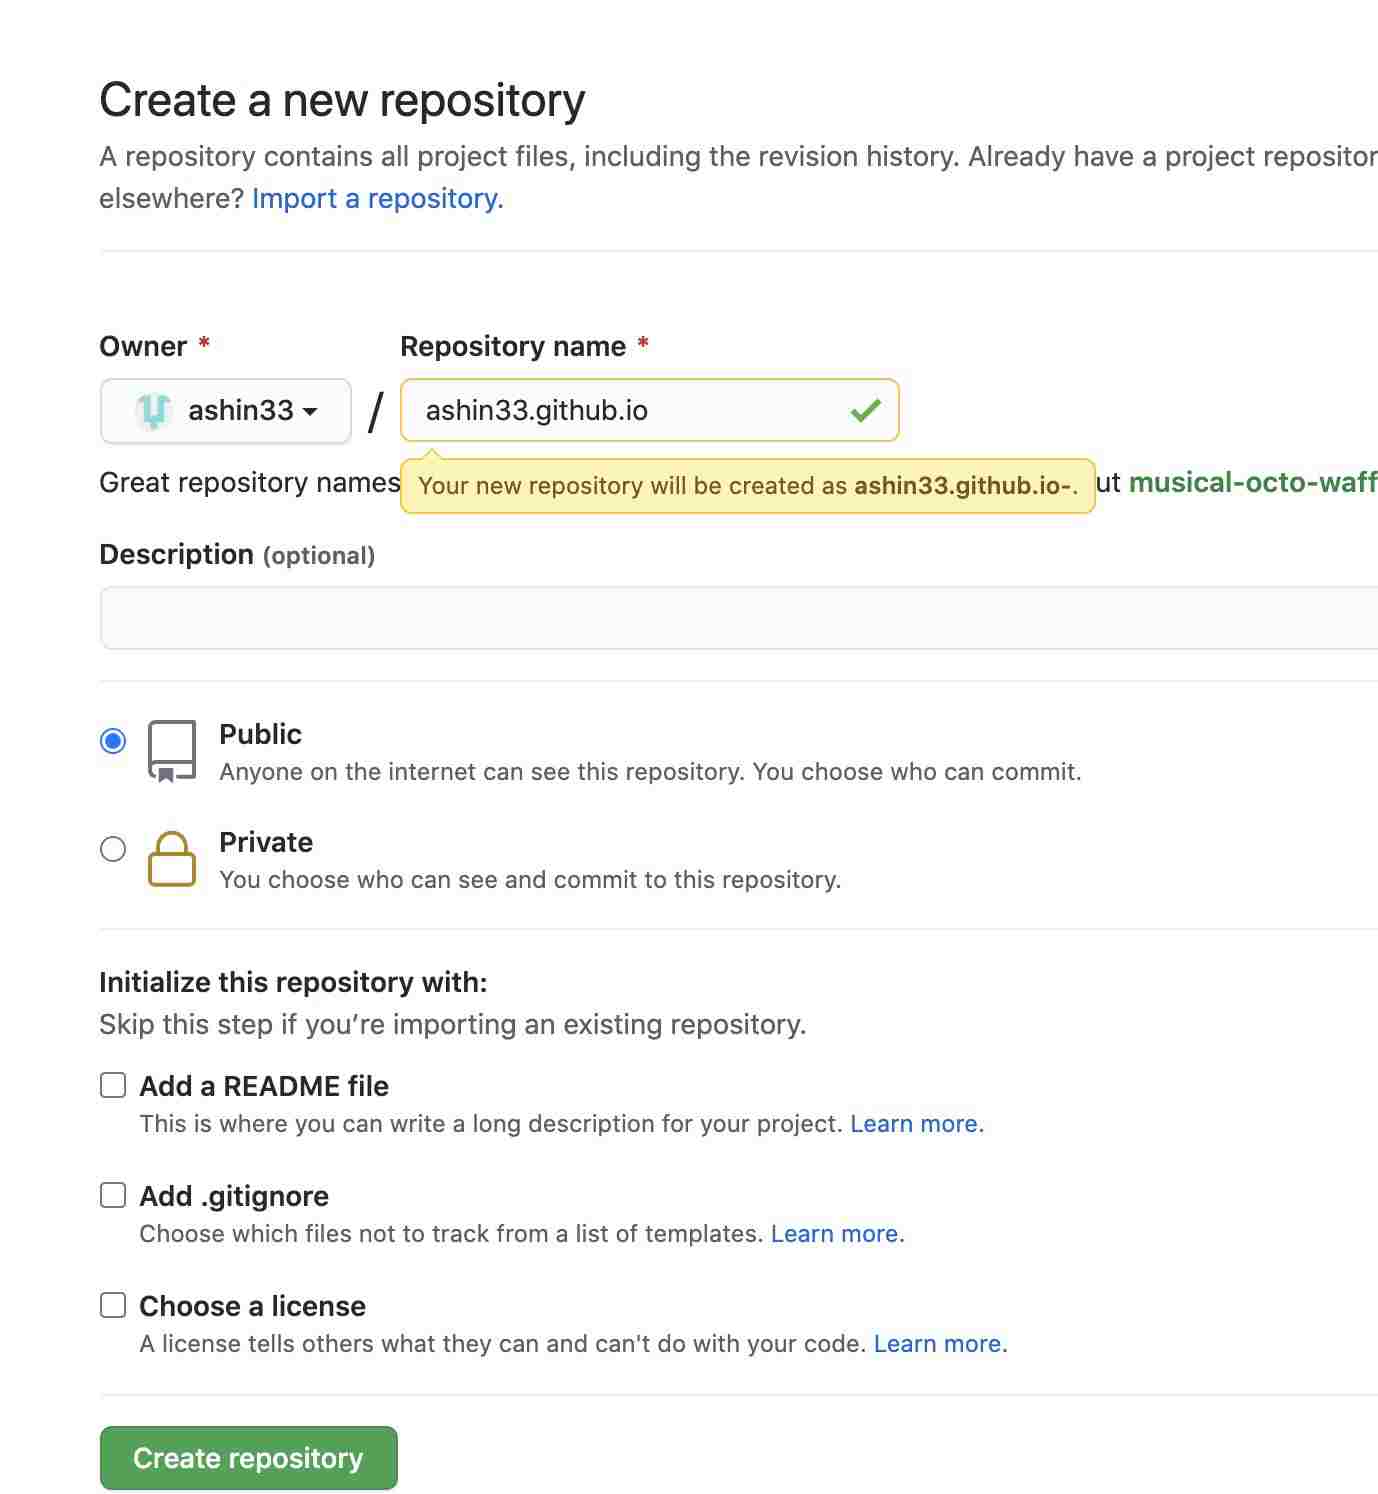
1. 在github中新建仓库并命名为 github用户名.github.io的仓库
2.新增token
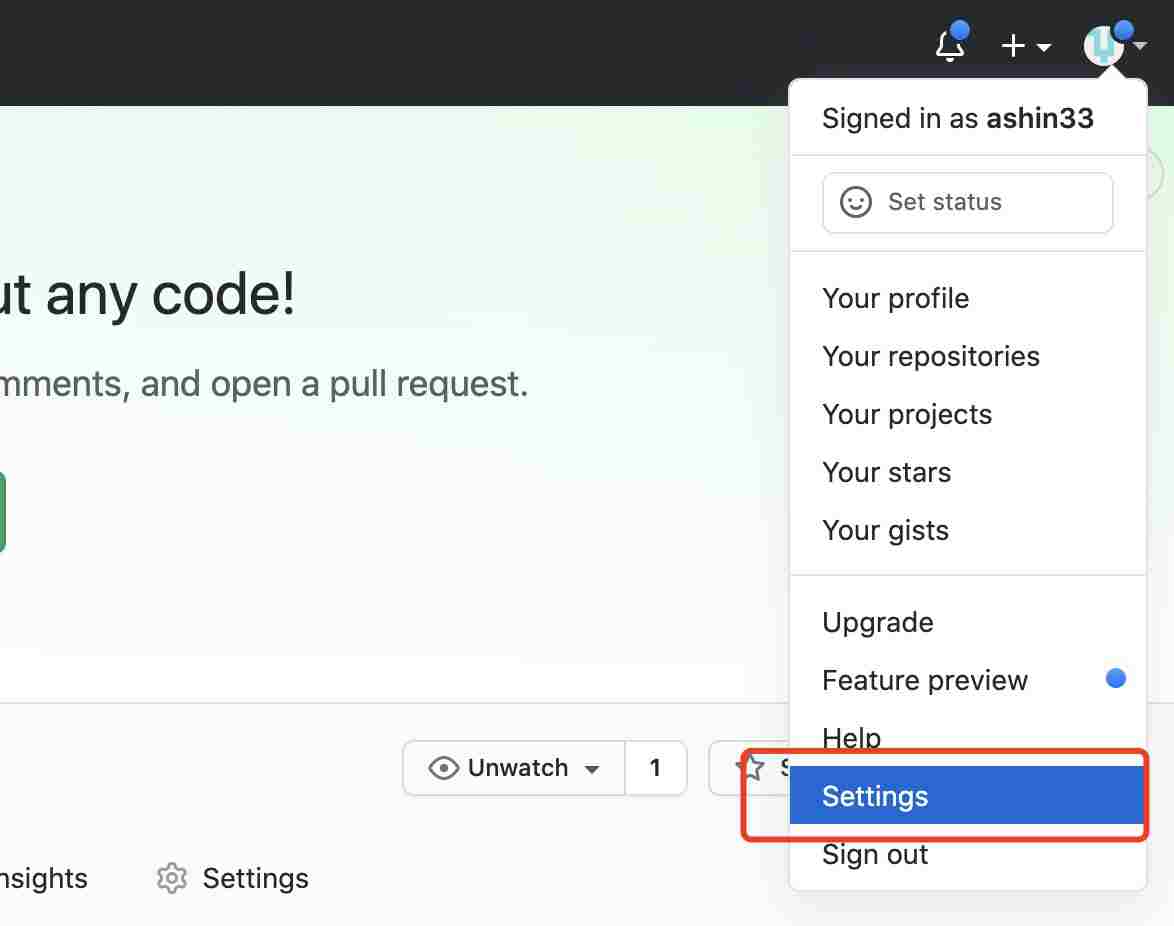
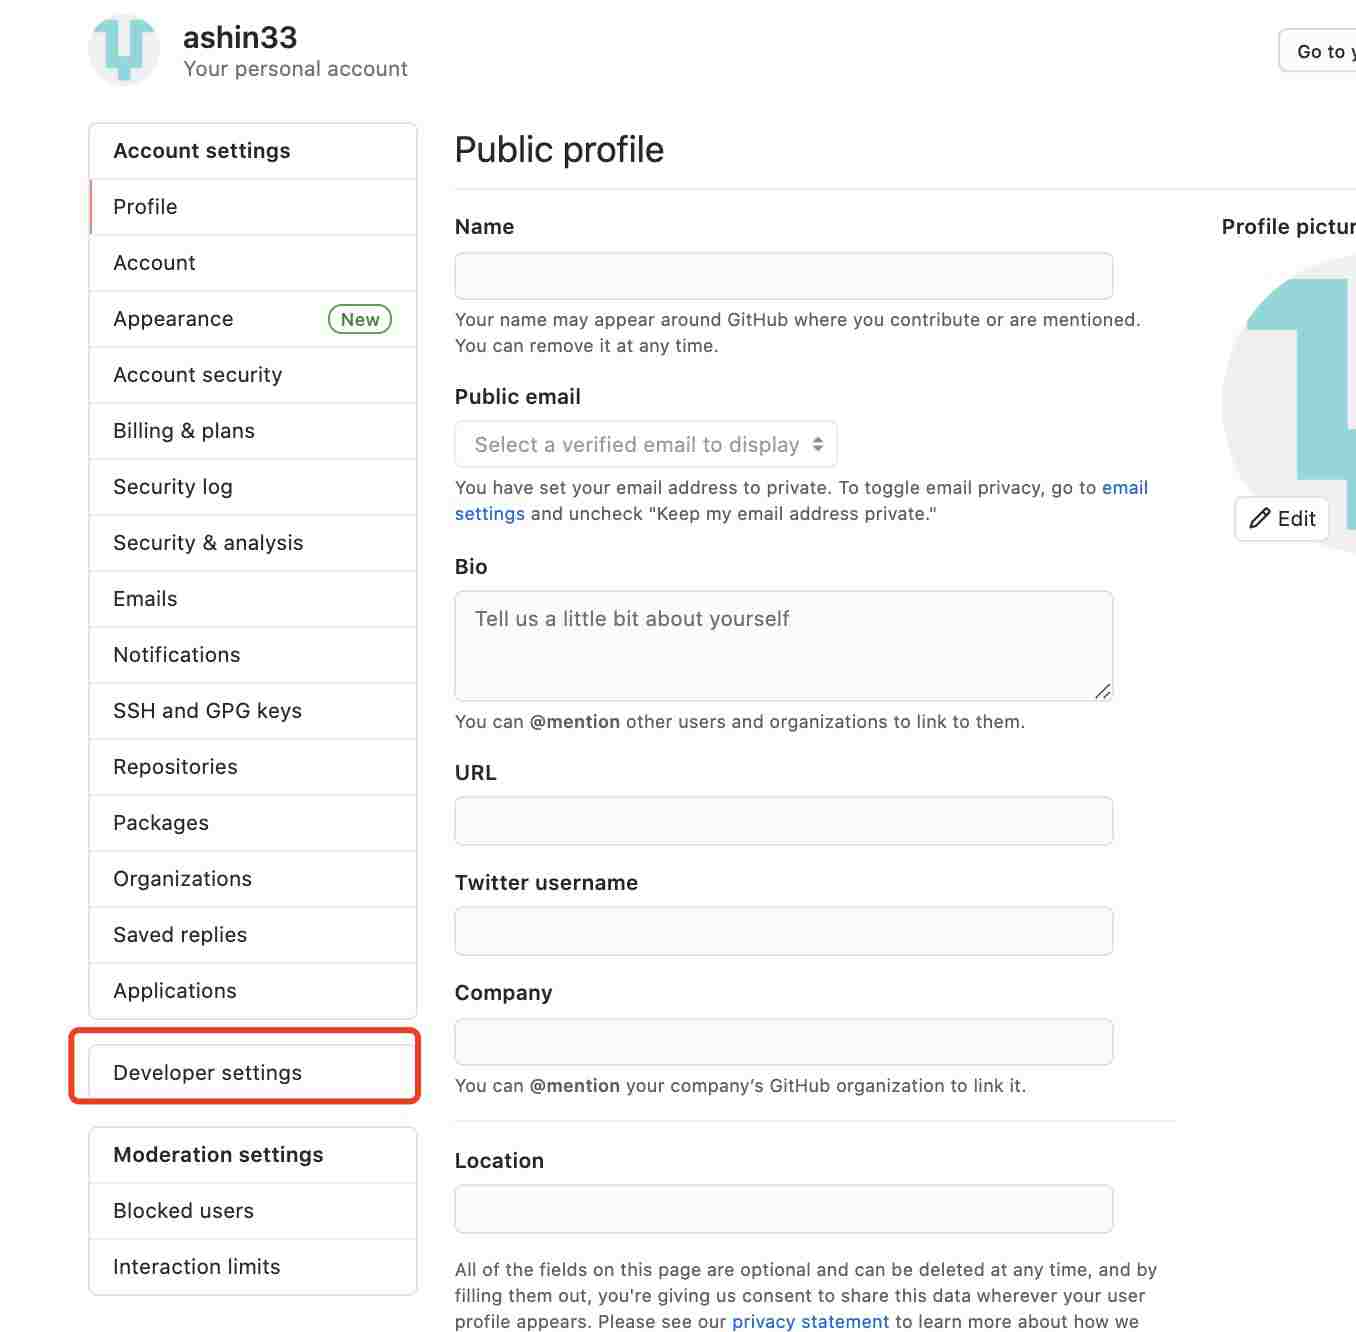
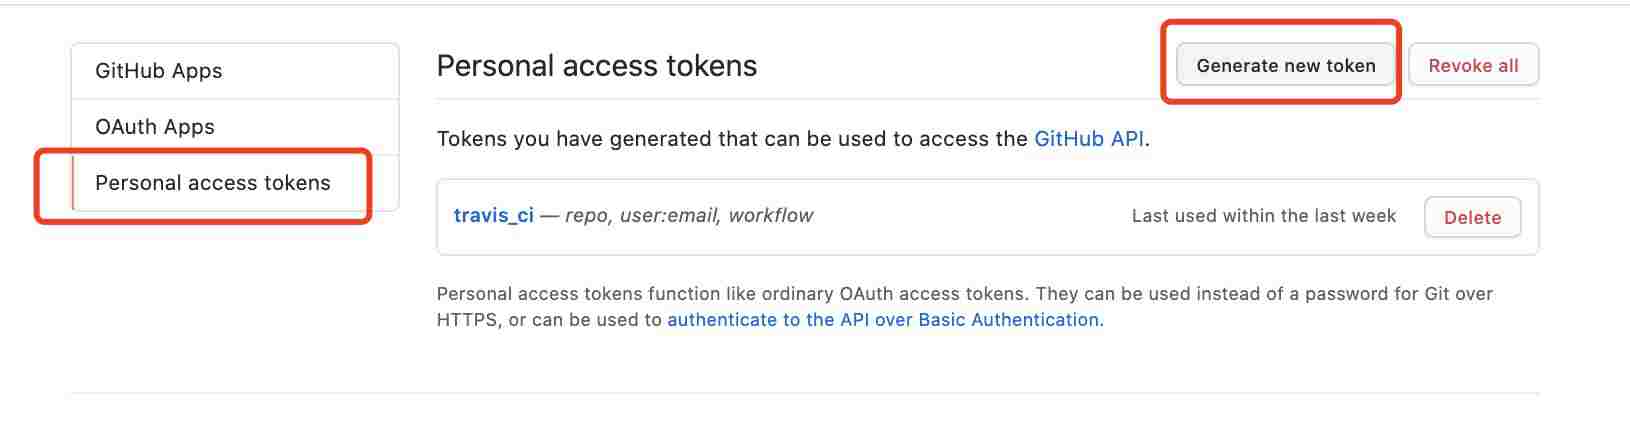
保存好生成的 token,后面用于配置 travis-ci
3.新建一个hexo分支用于存储后面的项目(分支可以自定义,后面配置中保持一致即可)
安装node.js
mac下载地址:https://nodejs.org/en/
其他系统,请自行寻找,如不本地调试,node.js也可以不装
node.js我使用的12.21.0版本,最新版的node.js在hexo构建后会报错
(node:25044) Warning: Accessing non-existent property 'lineno' of module exports inside circular dependency |
全局安装hexo
npm install -g hexo-cli |
添加环境变量
echo 'PATH="$PATH:./node_modules/.bin"' >> ~/.profile |
运行
$ hexo init ashin33 |
在指定目录下(上面为我的文件夹,请根据个人实际情况修改)生成hexo项目
运行以下命令就可以预览你的博客了
hexo clean ## 用于清除已构建的文件 |
安装hexo主题
git submodule add https://github.com/jerryc127/hexo-theme-butterfly.git themes/butterfly |
- 此处选择了butterfly主题,更多主题请移步 https://hexo.io/themes/
- 此处使用了git submodule 子模块加载命令,用于后续我们主项目推送时,将主题可以一起推到项目里,否则后面travis-ci自动构建会报错,找不到标签等错误
安装pug和stylus渲染器,用于渲染主题
npm install hexo-renderer-pug hexo-renderer-stylus --save |
hexo博客发布与butterfly主题的具体使用,参考各自文档
hexo文档:https://hexo.io/zh-cn/docs/
butterfly文档:https://butterfly.js.org/posts/21cfbf15/
hexo配置
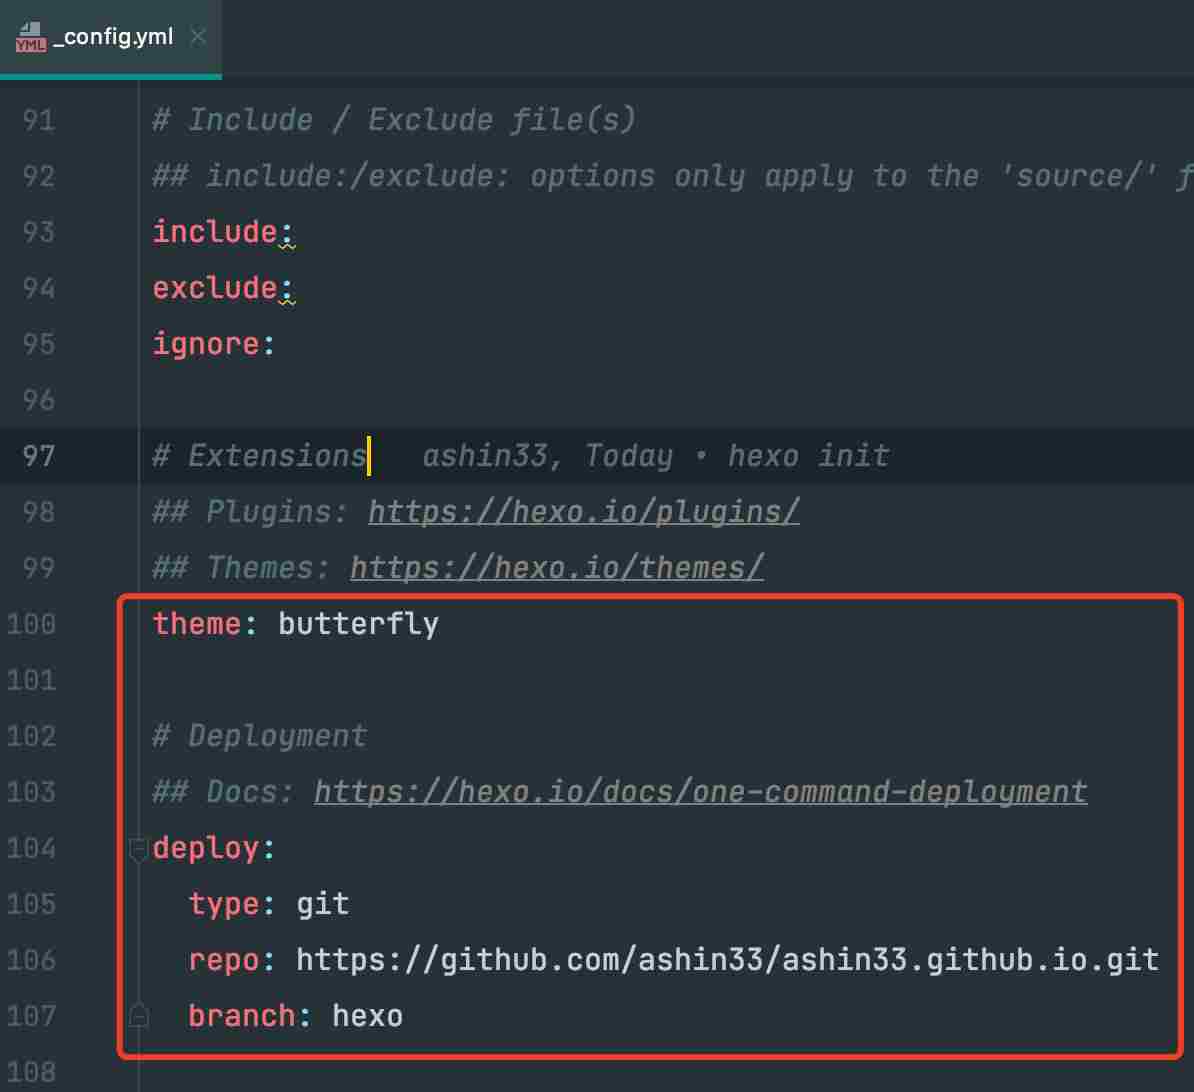
修改项目根目录下的_config.yml文件
title: 神的孩子都在跳舞 |

theme: butterfly ##themes目录下的主题目录 |
butterfly配置
- 复制themes/butterfly下的_config.yml文件到项目根目录下并重命名为_config.butterfly.yml
- hexo构建时会合并_config.yml和_config.butterfly.yml的配置
- 在此修改butterfly的配置,在后面更新主题是就不会影响配置了
配置travis-ci用于自动构建
- 不使用travis-ci手动构建也是可以的,可以直接使用
hexo deploy -g或者hexo d -g,此命令会根据hexo配置文件的deploy的参数直接构建并推送
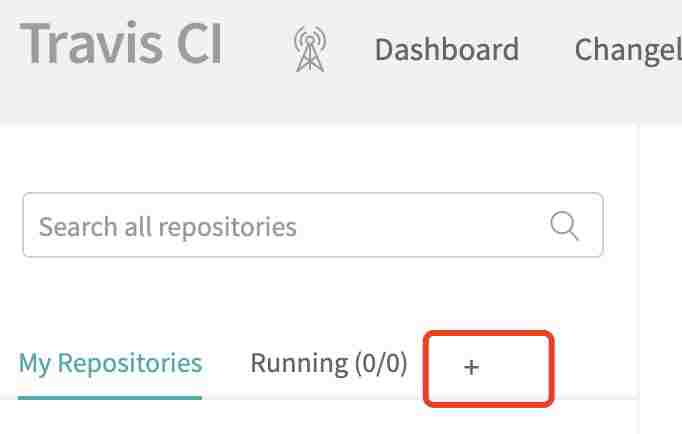
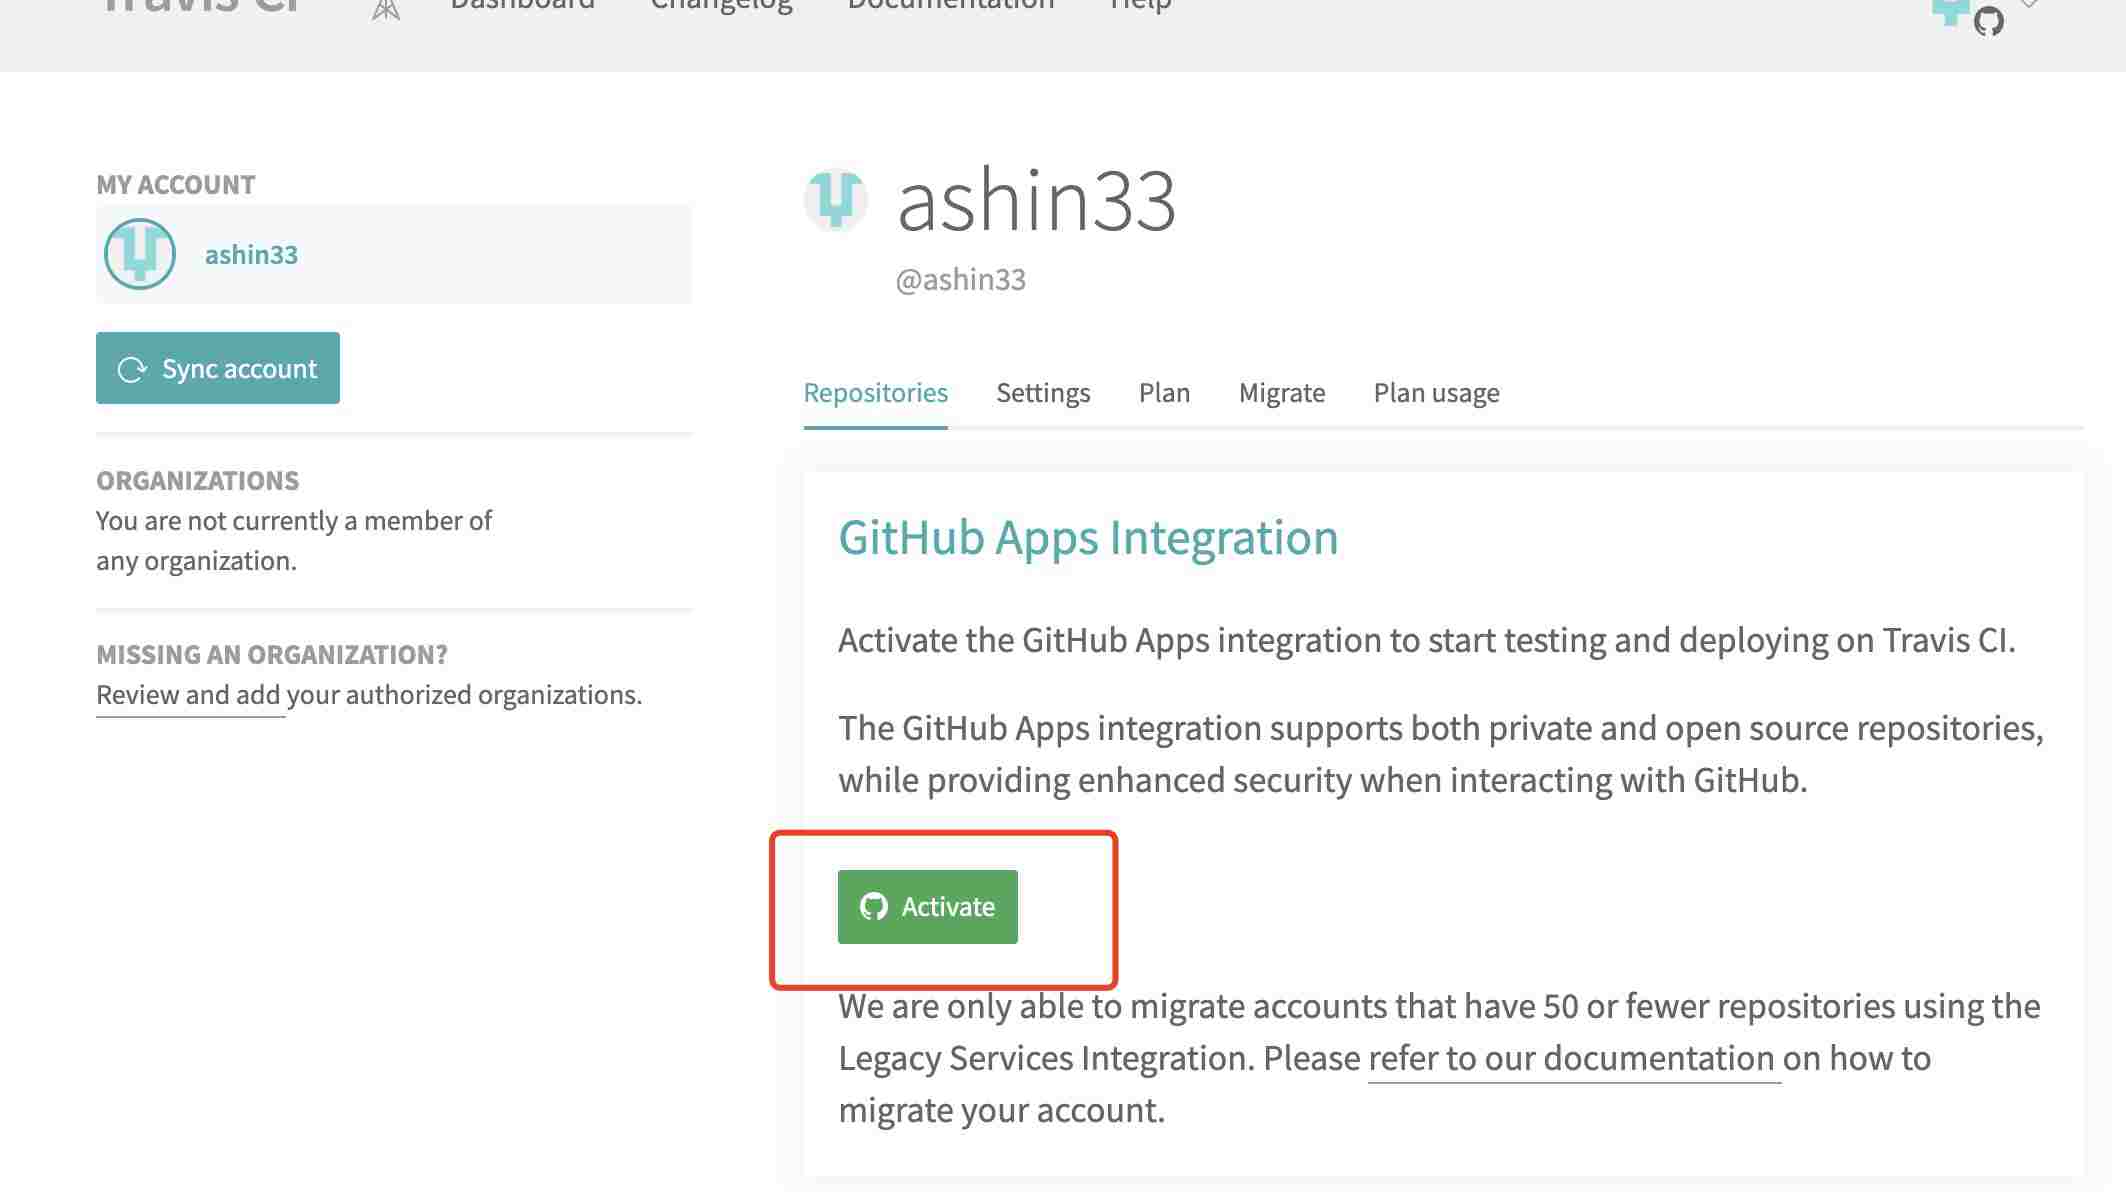
1. 在travis-ci官网用github账号登录 ,并激活,如图
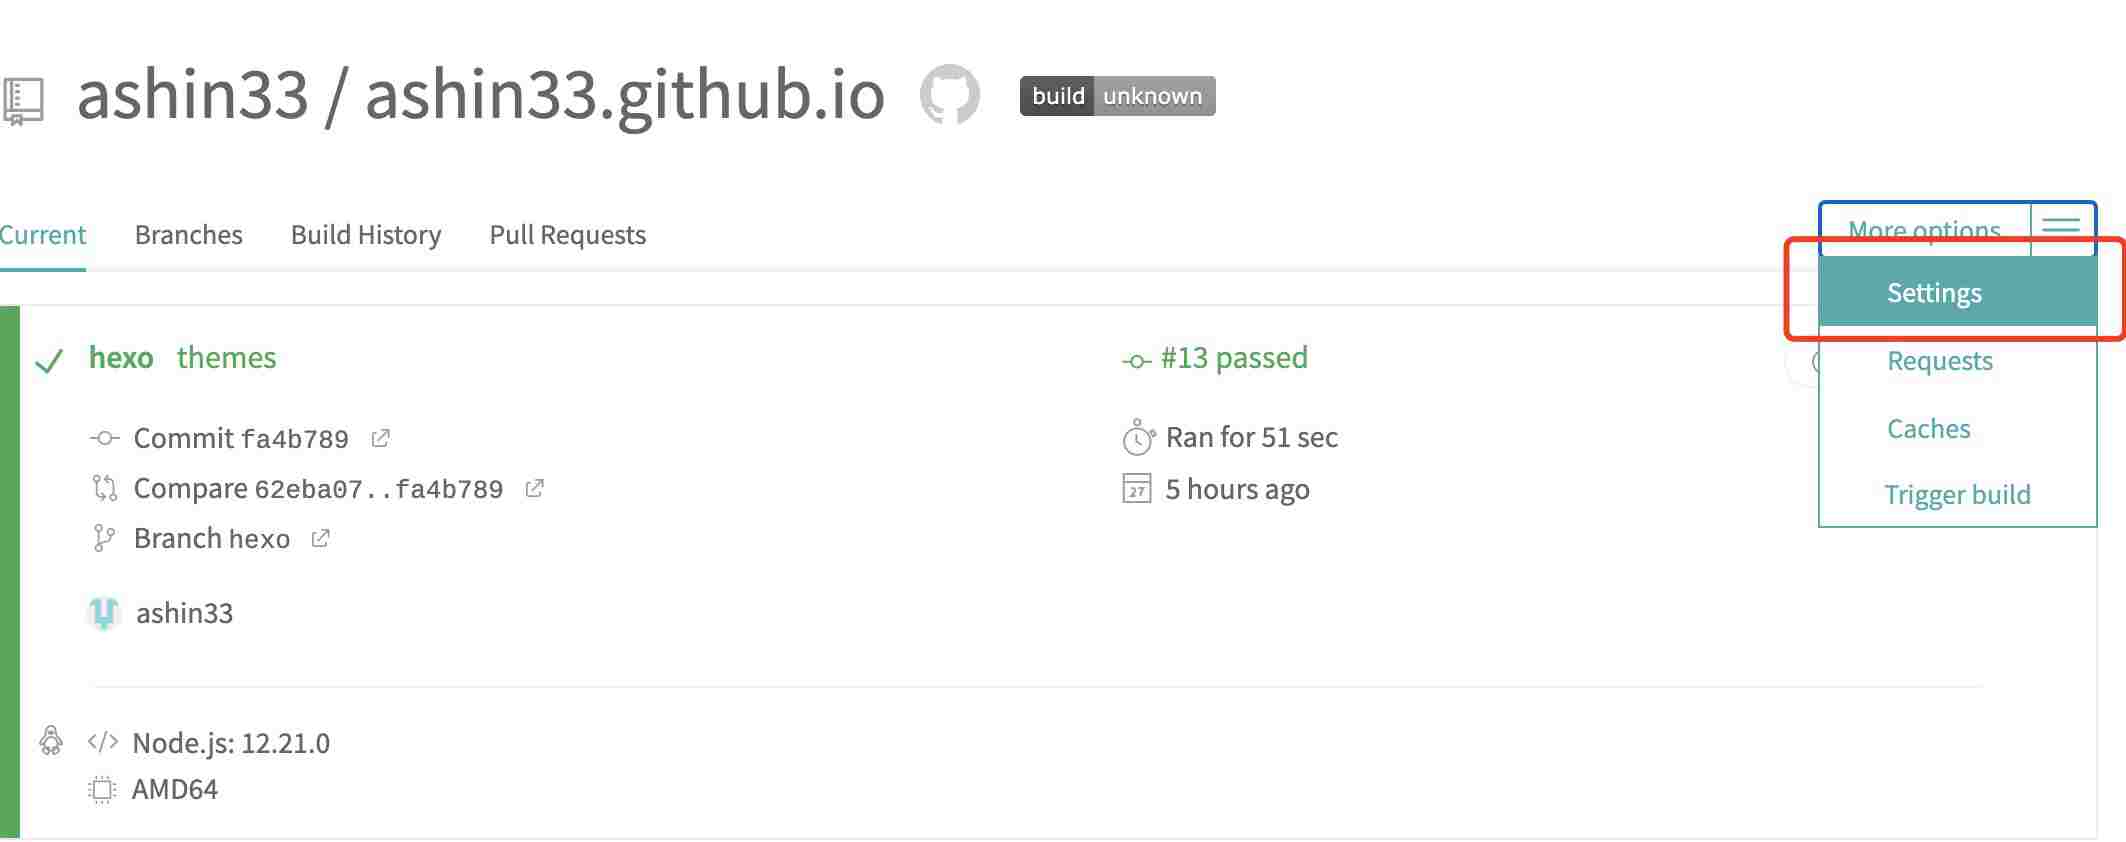
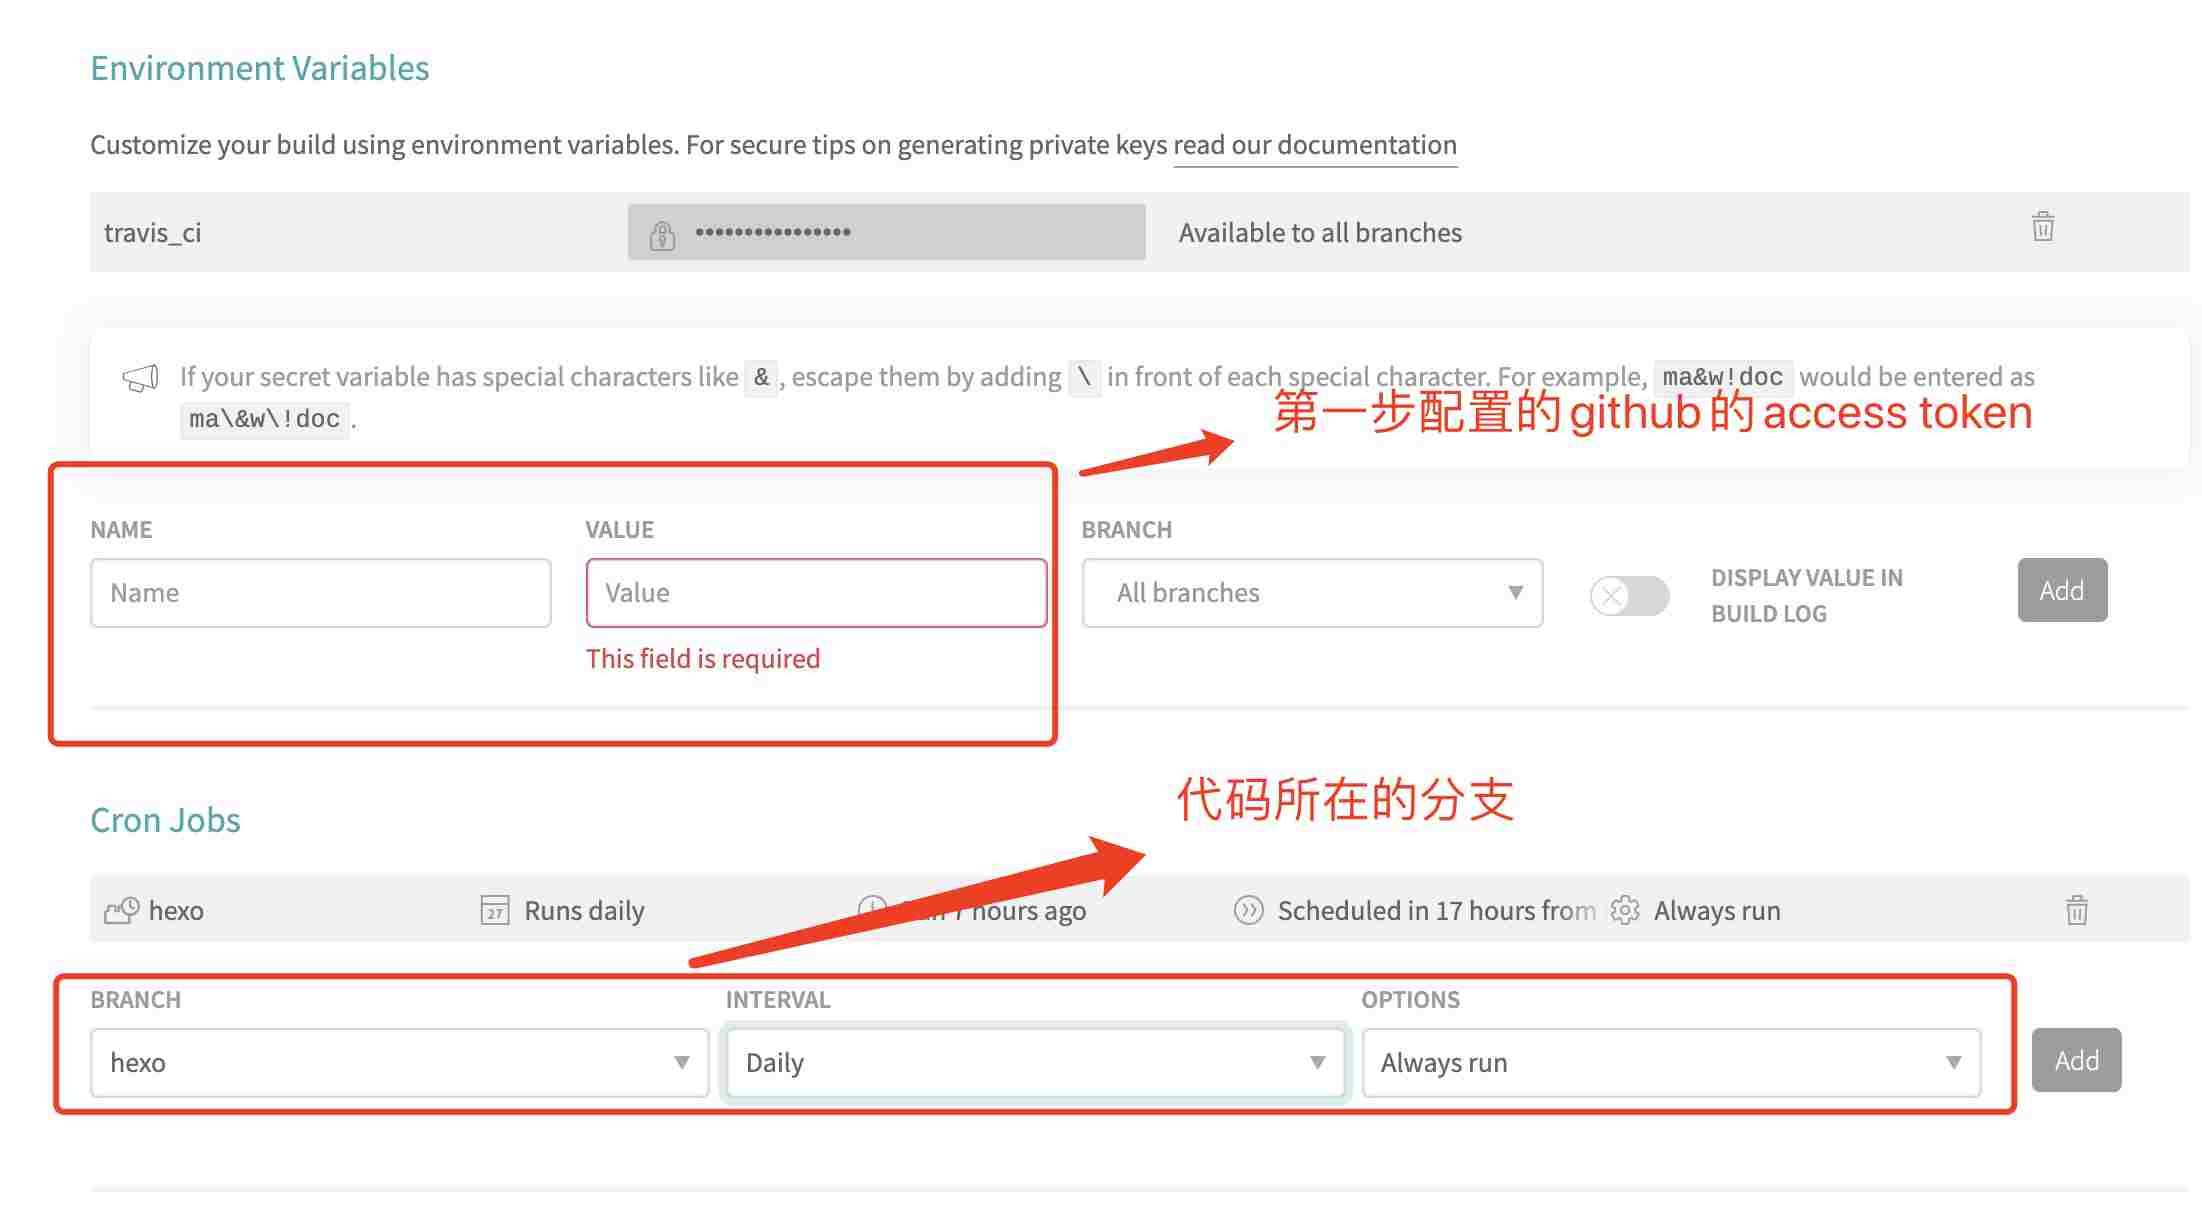
2. 进入travis-ci中的自己的项目中进入setting中,按下图进行设置
3.在项目根目录新增travis-ci的配置文件.travis.yml,并写入以下内容
# 指定语言环境 |
5.推送干净的项目代码(hexo clean过的项目代码)到hexo分支
6.代码推送后,进入travis中可以看到构建过程,等待构建成功,访问https://ashin33.github.io 即可,网址中的ashin33.github.io替换为你的仓库名即可


喜欢这篇文章的人也看了

评论
匿名评论隐私政策
✅ 你无需删除空行,直接评论以获取最佳展示效果